
It’s easy! In my opinion everyone can! Magento 2 has 4 different ways, how to install extension, but to keep this article understandable and short as possible, I chose the easiest according to how many different situations it covers. All examples in this article is based on Magento 2.3, but you can use this way, to install Magento 2 extensions on older releases too.

Manual installation
I chose “Manual installation” way because it works stable and every time. The extension will be uploaded to a server via ftp client. In the following examples I will use FileZilla ftp client. If you don’t have any ftp client installed on your cosmic spaceship, you can get it here. It’s total free.
1. Extract archive
All Magento 2 extensions are packaged to .zip archive. When you extract the archive, you might have different file structures like:
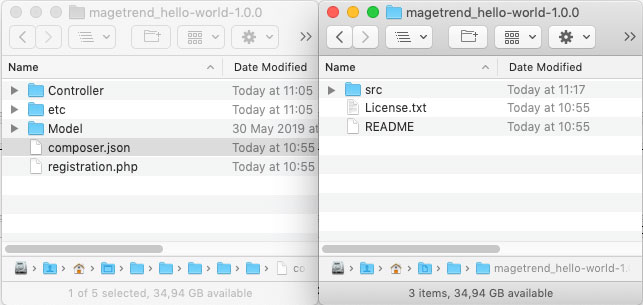
What we are looking for is the structure of files like in the left example. But it might be that your extension files is in one of the subfolders like in the example on the right.
2. Upload the files
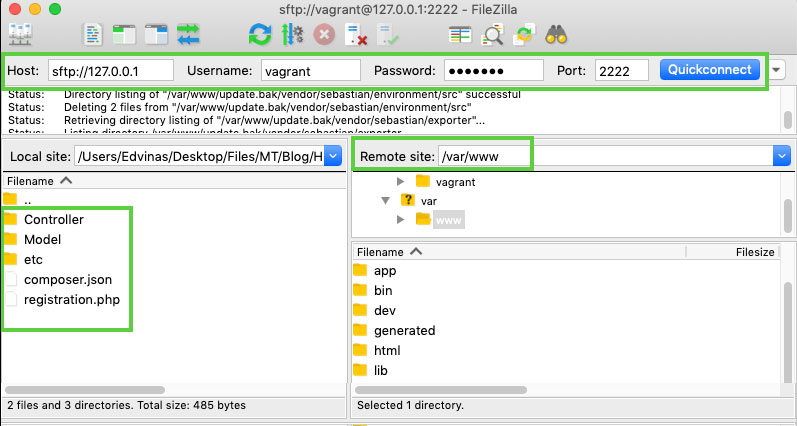
The next step is to upload extension files. Connect to your server via ftp client and navigate to Magento base directory. Base directory is the directory where all Magento files are located. In my example, it is /var/www
The next thing, we have to find it out where we will upload extension files. Open the extension file called registration.php via simple text editor.
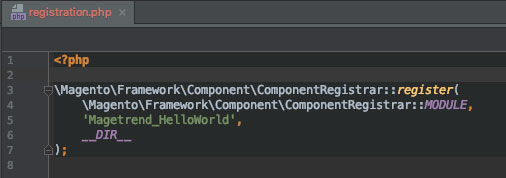
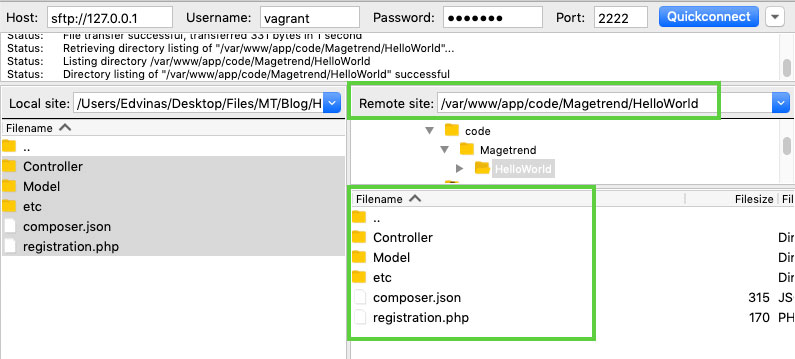
You can always check what is your extension name in this file and in this case, our extension name is Magetrend_HelloWorld. So we have to upload the files to the following directory
var/www/app/code/Magetrend/HellowWorldNow we know where exactly extension files has to be uploaded, so we can create a directory for our extension and upload the files.
3. Install extension via ssh
Now when we have uploaded our extension files to the server we need to run a few magic commands which will do the trick and install extension. Connect to your server via ssh client.
ssh username@server_ip -p 22Then navigate with “cd” command to Magento base directory. As I mentioned before, in the example base directory is /var/www;
cd /var/www;And now it’s time to run magic commands
bin/magento setup:upgrade;
bin/magento setup:di:compile;
bin/magento setup:static-content:deploy;
If these commands was executed successful, the extension should be installed! Congrats!
Troubleshooting
Css not working
You might get this error after extension installation, if your store locale is not default en_US. To solve this problem, you need to run the following ssh command and in the end add your store locale.
bin/magento setup:static-content:deploy de_DE;SQL error after extension installation
There is only one reason, related to extension installation – extension files was uploaded to wrong directory. And the consequences of this, Magento has missed to run setup script and create required database tables or columns. So there is need run setup script and create missing database structure.
- Check, where your extension files is uploaded
MAGENTO_BASE/app/code/Vendor/ExtensionName- Run the following command via admin or phpMyAdmin
DELETE FROM `setup_module` WHERE `module` = 'Vendor_ExtensionName'- Run again the following commands via ssh
bin/magento setup:upgrade;
bin/magento setup:di:compile;
bin/magento setup:static-content:deploy;
That’s all this time. If something is missing, please let me know, in the comments bellow. I will be more than happy to append this post with your case.